Episode 4: The Girls (and Boy) Who Leapt Through Time |
Lucky Lucky Memorial Routes |
|
As you progress further into the game, opportunities to unlock additional routes
for Episode 1, Lucky Lucky Memorial, open up. Episode 4 offers two additional routes to unlock
with the following criteria:
- Yutaka Lucky Lucky Memorial Route -- Complete The Girls (and Boy) Who Leapt Through Time,
getting any ending, with the Yutaka flag set.
- Minami Lucky Lucky Memorial Route -- Get the good ending to Yutaka's Lucky Lucky Memorial route.
More details on how to meet these criteria will be described further down.
|
|
This Episode has four mini scenarios you can unlock with the following unlock criteria:
- Kanata Mini Scenario -- View a certain optional scene in The Girls (and Boy) Who Leapt Through Time
- Yukari Mini Scenario -- View a certain optional scene in The Girls (and Boy) Who Leapt Through Time
- Yutaka Mini Scenario -- Get the good ending to Yutaka's Lucky Lucky Memorial Route
- Minami Mini Scenario -- Get the good ending to Minami's Lucky Lucky Memorial Route
How to get these good endings, as well as which scenes you have to view, will be described further down.
|
Route Guide -- Episode 0 (Episode 4 Version) |
|
NOTE: As with the previous guides for Episode 0, if a choice that's present in this Episode is not
mentioned here, it's either because it has no impact on anything, or because the same choice
appeared in previous episode(s), and so has the same impact on things like character favorability
that it did in those previous episode(s).
|
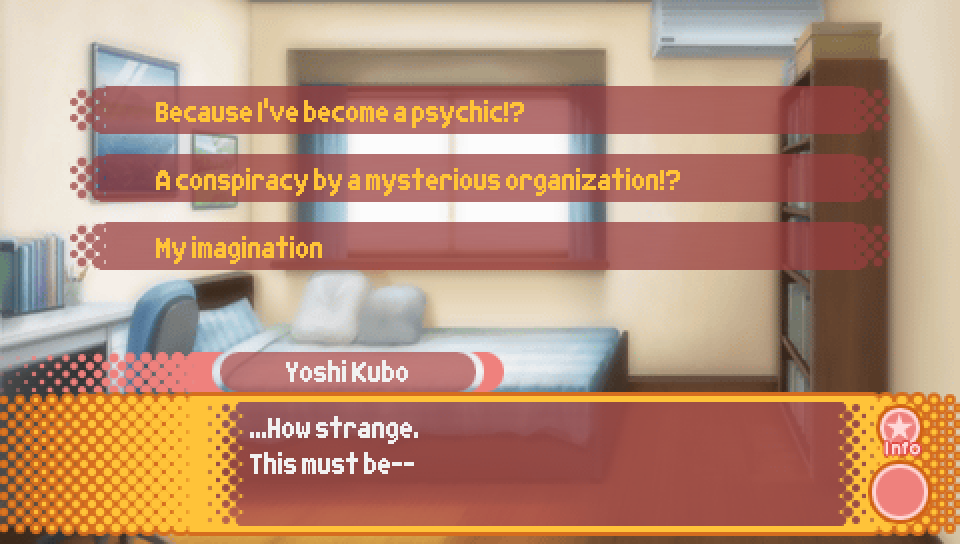
- Because I've become a psychic!? -- no effect
- A conspiracy by a mysterious organization!? -- no effect
- My imagination -- Run into Ayano and Misao + set the Ayano Lucky Lucky Memorial flag
(see Episode 3 guide for details)
Additionally, if you choose "My imagination" so the protagonist runs into Ayano and Misao on the way to school,
they will recognize him when they are properly introduced during play practice on the second day.
|
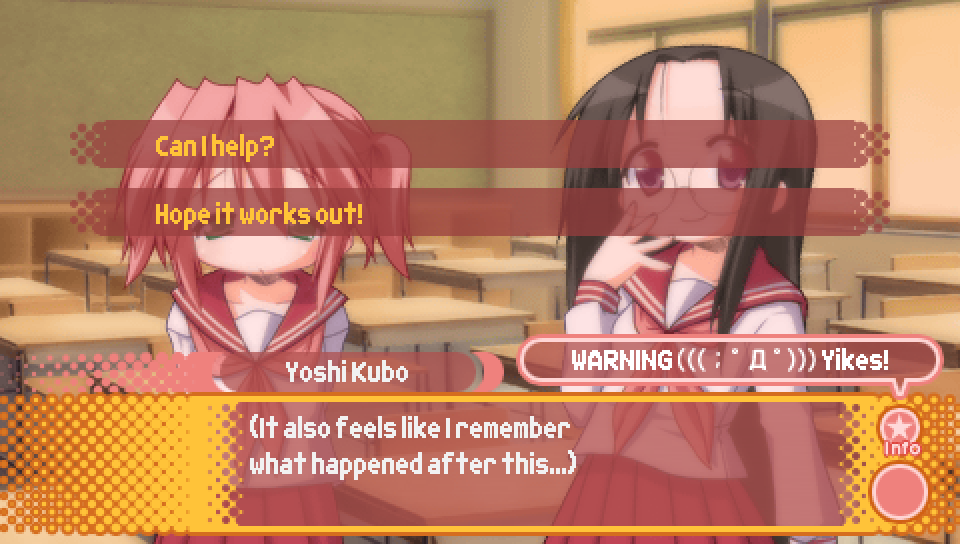
- Can I help? -- replay Episode 3
- Hope it works out! -- continue with Episode 0
|

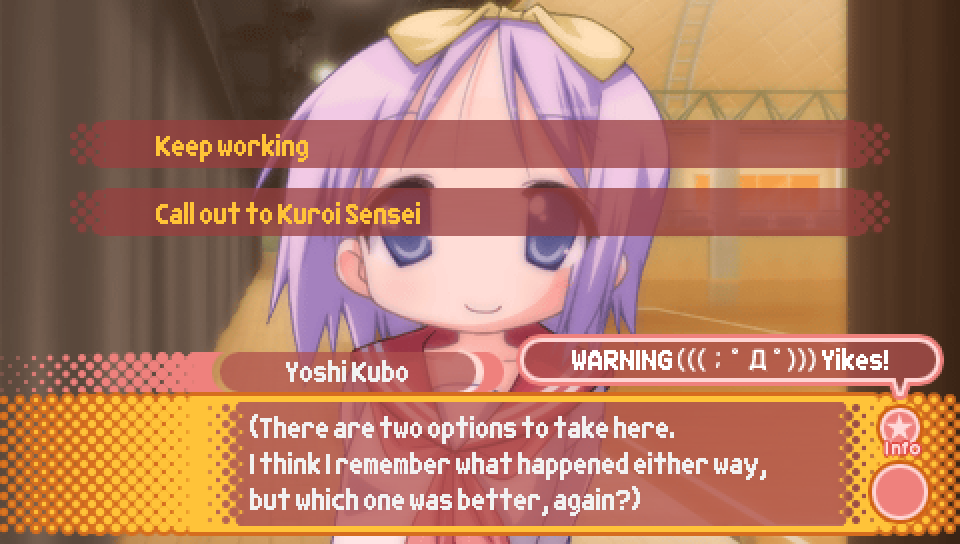
- Keep working -- replay Episode 1
- Call out to Kuroi Sensei -- continue with Episode 0
|
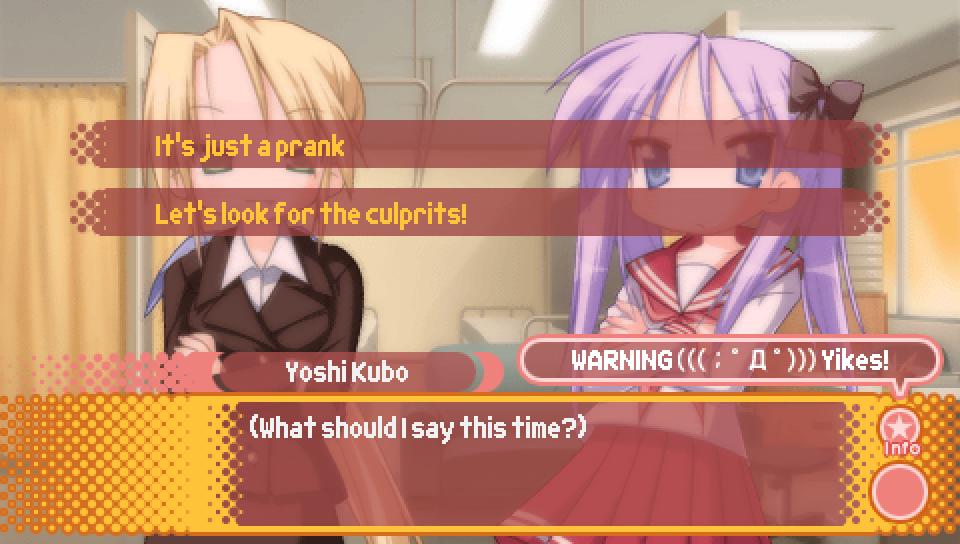
- It's just a prank -- continue with Episode 0
- Let's look for the culprits! -- replay Episode 2
|
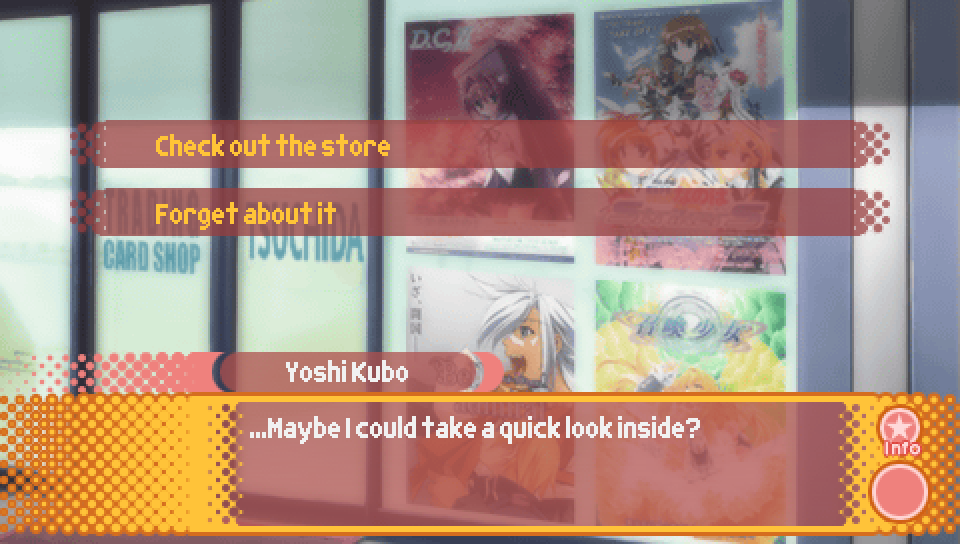
- Check out the store -- buy trading cards with the Episode 0 distribution
- Forget about it -- don't buy trading cards
Note that by going inside the store, you unlock the ability to go to the Trading Card Shop in Episode 1.
Additionally, as a reminder, the trading card distribution for Episode 0
is that each of the 40 trading cards have a 2.5% chance of appearing (see the Episode 2 guide for more details).
|
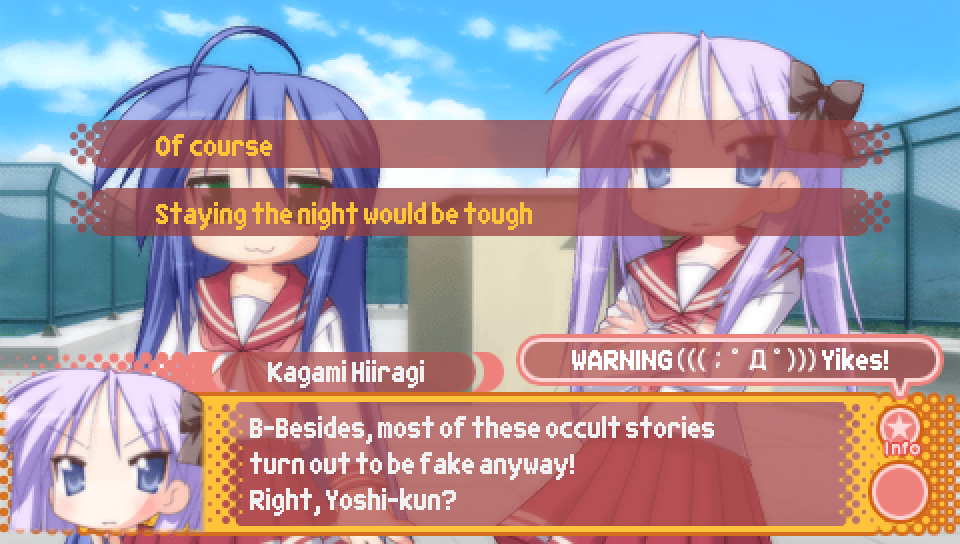
- Of course -- stay later after school
- Staying the night would be tough -- don't stay as late after school
If you choose "of course", then the following scene of everyone being at school
late at night will be different than it was in Episode 2's and Episode 3's versions of Episode 0.
In this version, Kagami will suggest going to the convenience store for a snack break,
after which they will continue working.
If you choose "staying the night would be tough", the following scene of everyone being at school
late at night will play out the same as in Episode 2's and Episode 3's versions of Episode 0,
in which Kagami will suggest going to the convenience store on the way home from school
once they are done working.
Picking "of course" is necessary in order to make progress towards Episode 4,
as it's only in that version of the following scene where the option to enter Episode 4
will end up appearing.
|
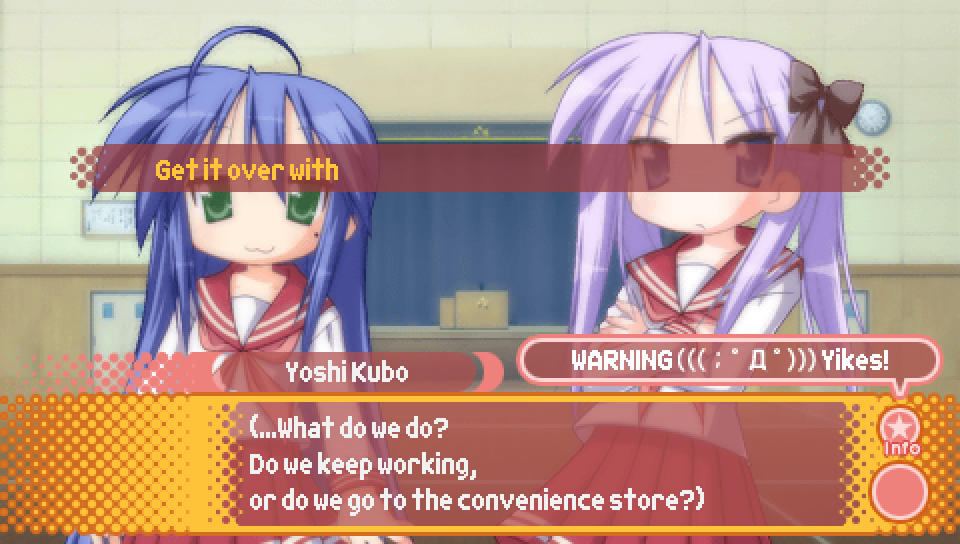
This choice marks the point where you can either enter Episode 4 proper,
or continue along Episode 0.
- Let's try to finish quickly -- continue with Episode 0
- Send some people to the convenience store -- enter Episode 4
|
This Unlucky★Sisters segment is only viewable at this point in the game.
Once you have gotten the good ending for Episode 4 at least once, this segment will no longer be viewable
on your current save file, so make sure you don't miss it!
After this segment is over, the rest of Episode 0 plays out the same as in Episode 2 and Episode 3's version.
|
Route Guide -- The Girls (and Boy) Who Leapt Through Time |
|
This is the first episode to use both clear points and the character favorability system.
Clear points are used to determine whether you get the good ending or the bad ending,
while the ending itself will change slightly based on character favorability.
This guide will tell you which choices give favorability and to who, as well as what choices
give you clear points.
|
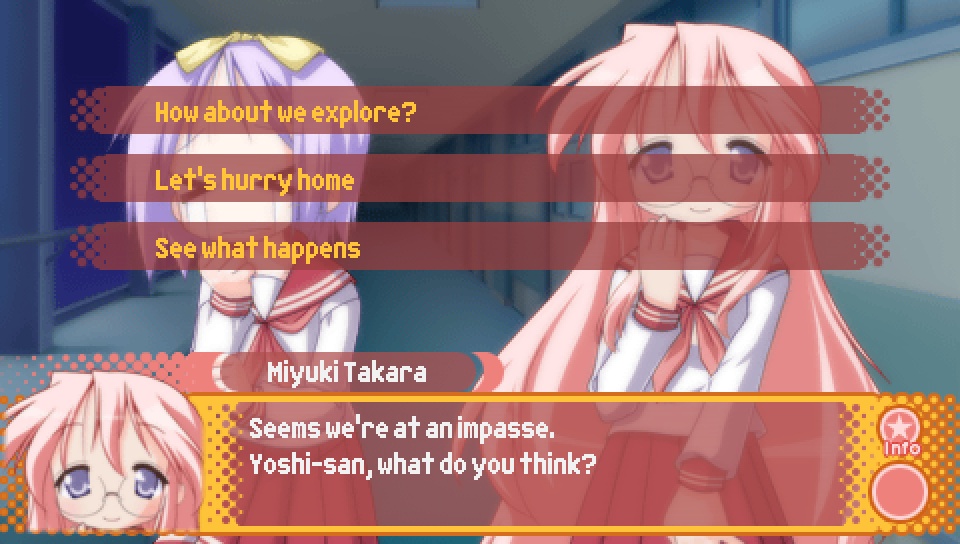
- How about we explore? -- Konata favorability + 3
- Let's hurry home -- Kagami favorability + 3
- See what happens -- Miyuki favorability + 3
|
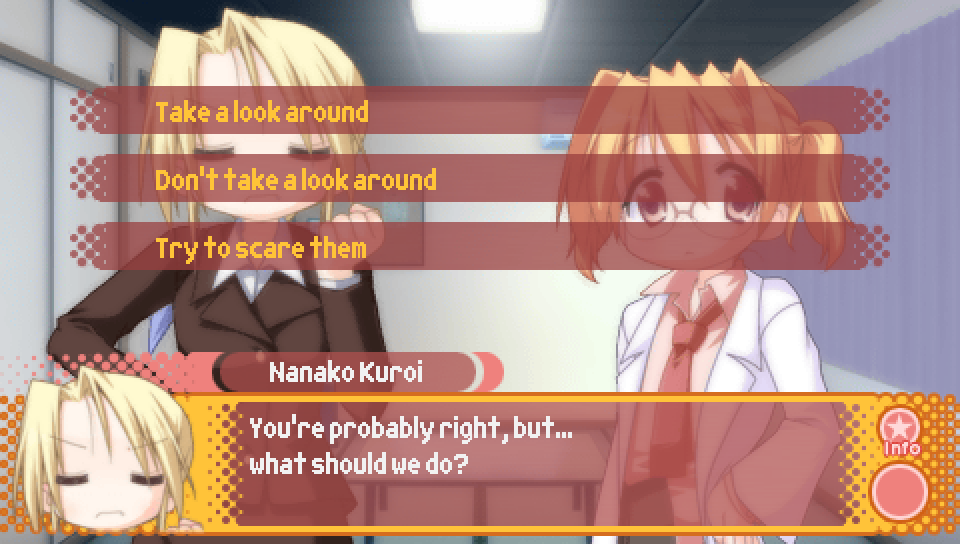
- Take a look around -- See Scene A later
- Don't take a look around -- See Scene B later
- Try to scare them -- See Scene C later
There is a point later on into this episode where which scene you get depends on which choice you pick here.
Which scene you get for each choice and when this happens will be pointed out when it becomes relevant.
|
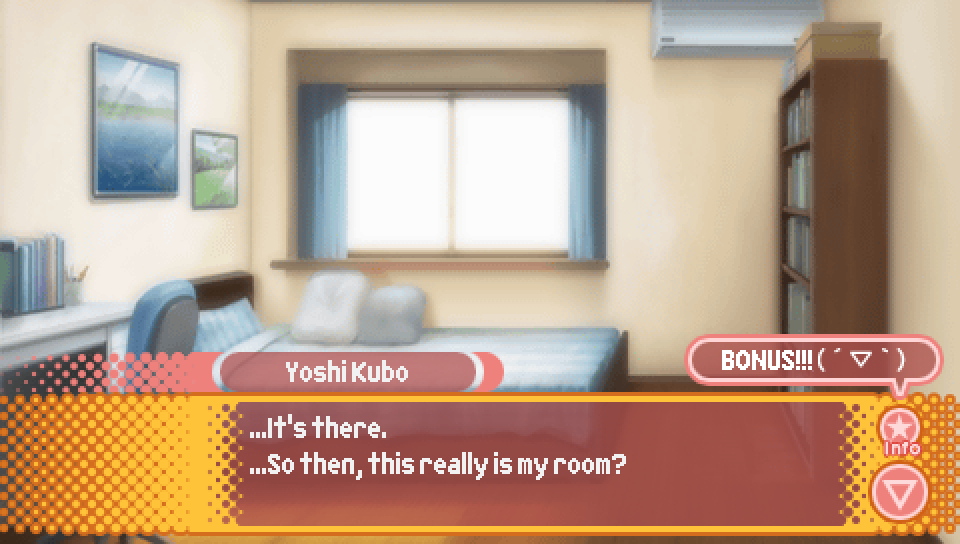
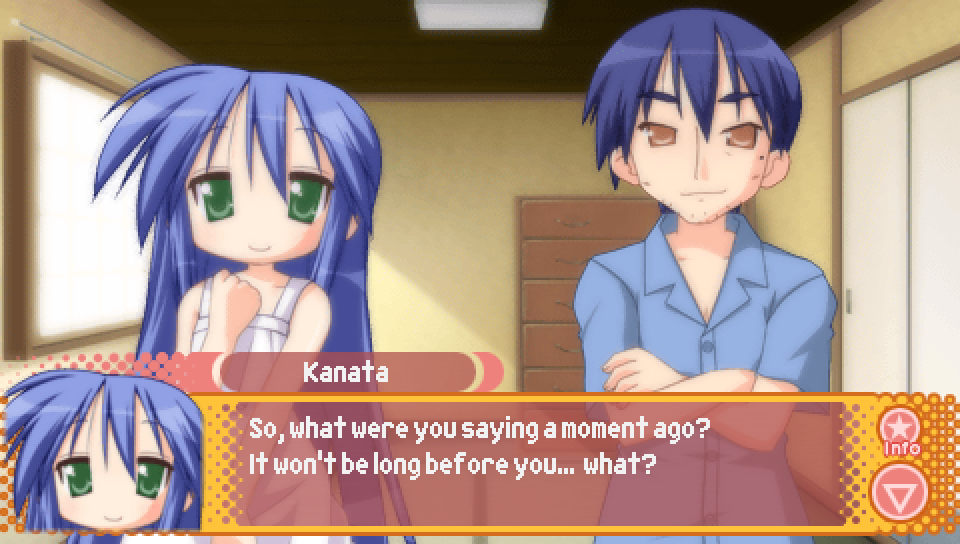
When the protagonist time leaps from the school hallway at night to his bedroom in the morning,
he checks the place where he hid his New Year's money in order to confirm that he actually is in
his bedroom. This gives you 500 yen that you can spend on trading cards.
|
The Girls (and Boy) Who Leapt Through Time -- Branching Point #1 |
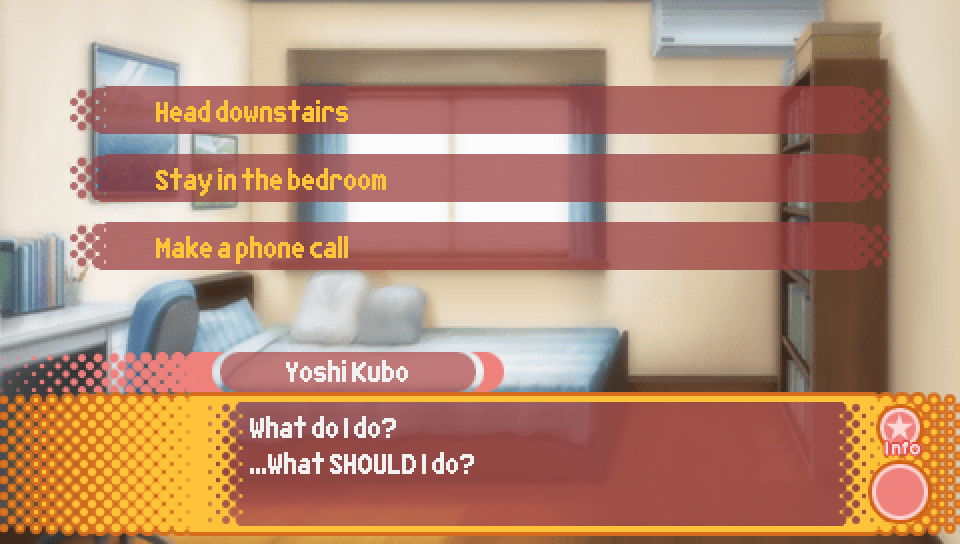
- Head downstairs -- Time leap to the day 2 lunch scene from Episode 0
- Stay in the bedroom -- Time leap to the Trading Card Shop
- Make a phone call -- Time leap to the protagonist and Yamato's self introduction scene
Depending on which choice you make here, the protagonist will time leap to a different
time and place. Each of these choices end up at the same place in the end, but have unique
scenes before converging.
|
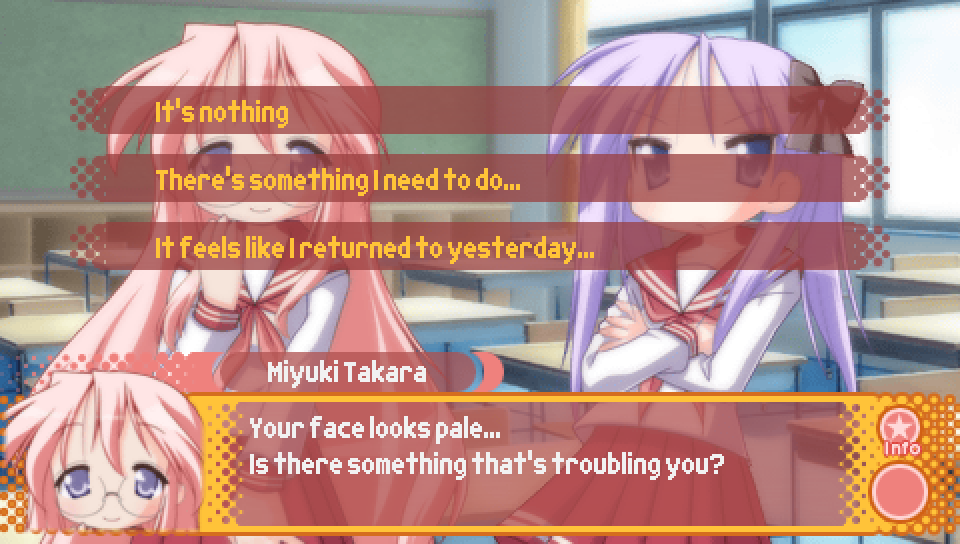
- It's nothing -- Time leap to the classroom earlier in the night this Episode takes place during
- There's something I need to do -- Time leap to Takamiya Shrine during the summer
- It feels like I returned to yesterday -- Time leap to the girls' changing room before the protagonist transferred
Note that you will only see this choice if you picked "Head downstairs" when the protagonist time leapt into his room.
|
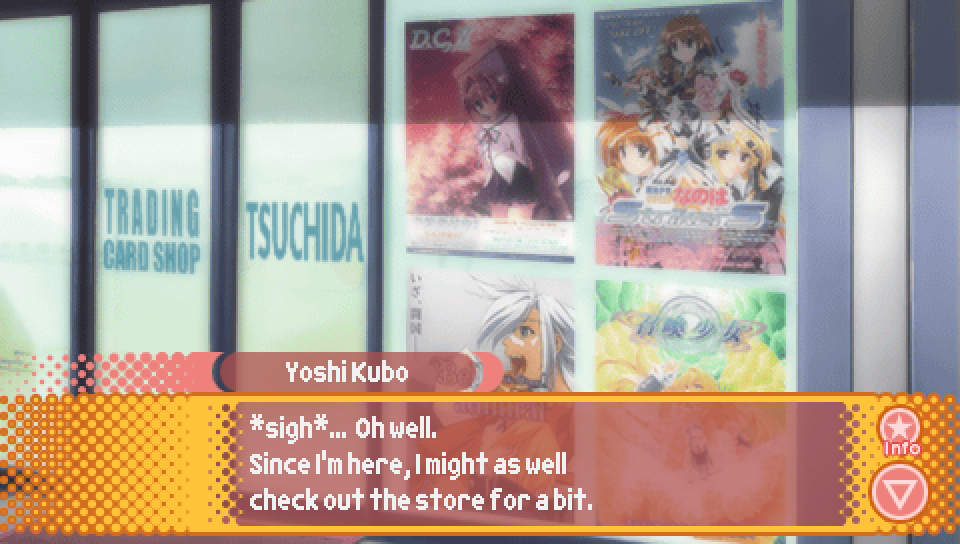
If you picked "Stay in the bedroom" when the protagonist time leapt into his room,
he will end up time leaping outside of the Trading Card Shop. He will then enter the shop,
at which point you can choose to buy trading cards with the Episode 4 card distribution,
which as a reminder has a 9.0% chance for cards 22-28, and a 1.2% chance for all other cards.
|
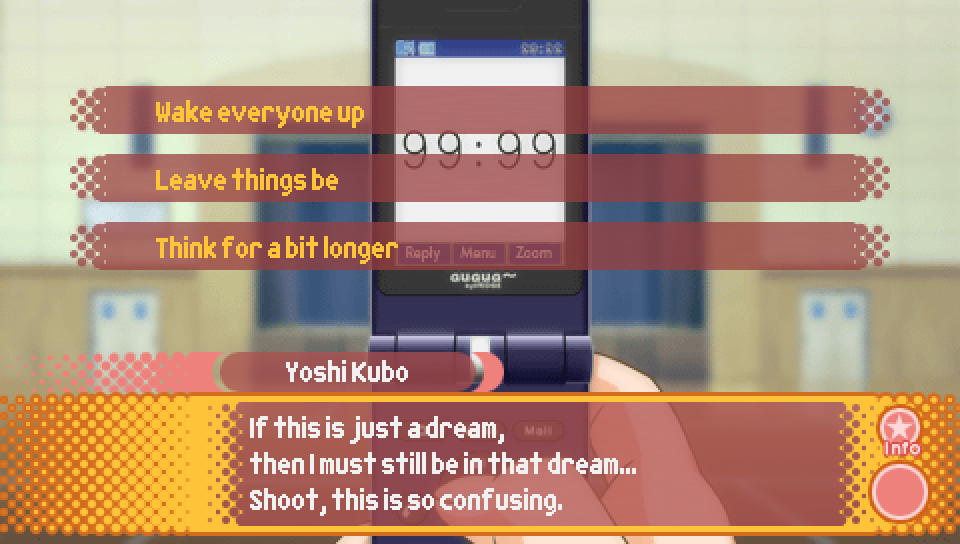
- Wake everyone up -- Time leap to the middle of world history class
- Leave things be -- Time leap to Konata's house when she was a young child
- Think for a bit longer -- Time leap to when Kagami sprains her ankle in Episode 1
Note that you will only see this choice if you picked "Stay in the bedroom"
when the protagonist time leapt into his room.
|
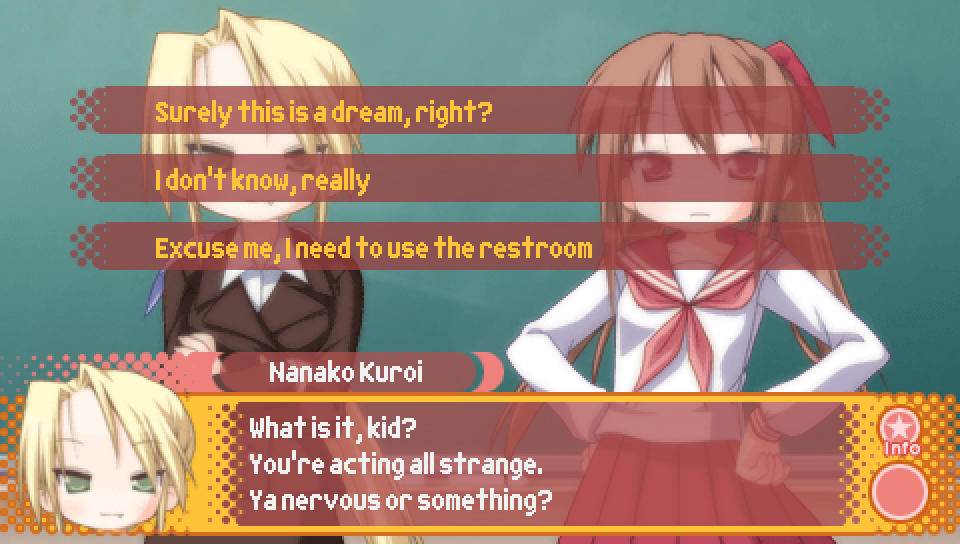
- Surely this is a dream, right? -- Time leap to when Hiyori and Patty try to blackmail the protagonist in Episode 2
- I don't know, really -- Time leap to Miyuki's neighborhood when she was a young child
- Excuse me, I need to use the restroom -- Time leap to when everyone disappears earlier in this Episode
Note that you will only see this choice if you picked "Make a phone call" when the protagonist time leapt into his room.
|
By picking "I don't know, really" for the above choice, you will unlock the Yukari mini scenario once you have
viewed this scene featuring Miyuki as a young child.
|
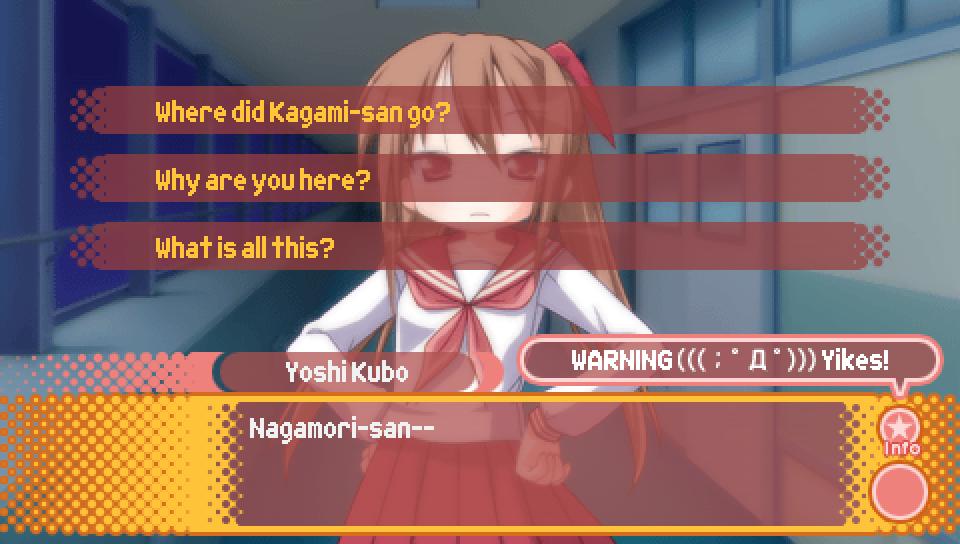
- Where did Kagami-san go? -- no effect
- Why are you here? -- clear points + 1
- What is all this? -- no effect
|
The Girls (and Boy) Who Leapt Through Time -- Branching Point #2 |
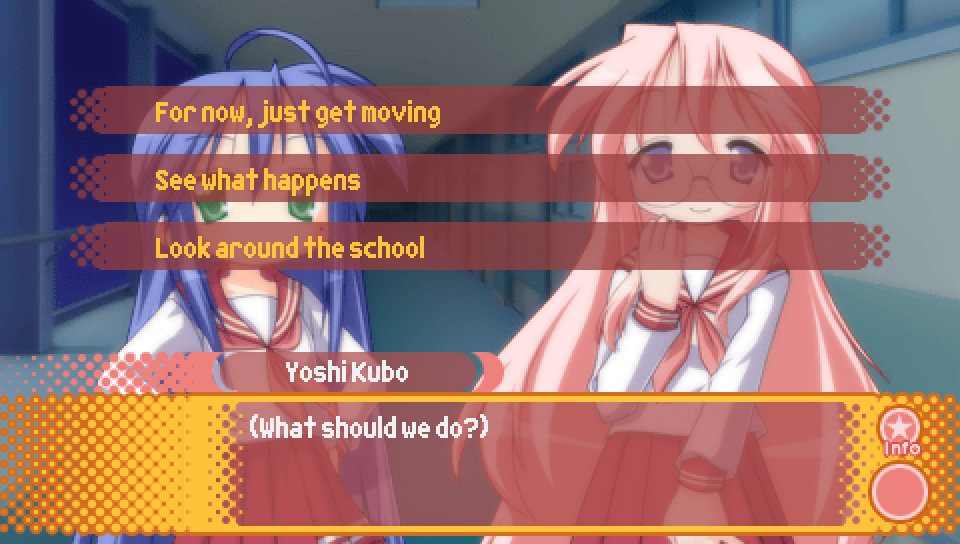
- For now, just get moving -- Miyuki favorability + 3,
time leap to the second floor hallway during the day.
- See what happens -- Tsukasa favorability + 3,
time leap to the gymnasium during play practice on day 2 of Episode 0.
- Look around the school -- Konata favorability + 3,
head to the Star Sakura Tree without time leaping.
Depending on which choice you make here, the cast will end up in different times and places.
Each of these choices end up at the same place in the end, but have unique scenes before converging.
|
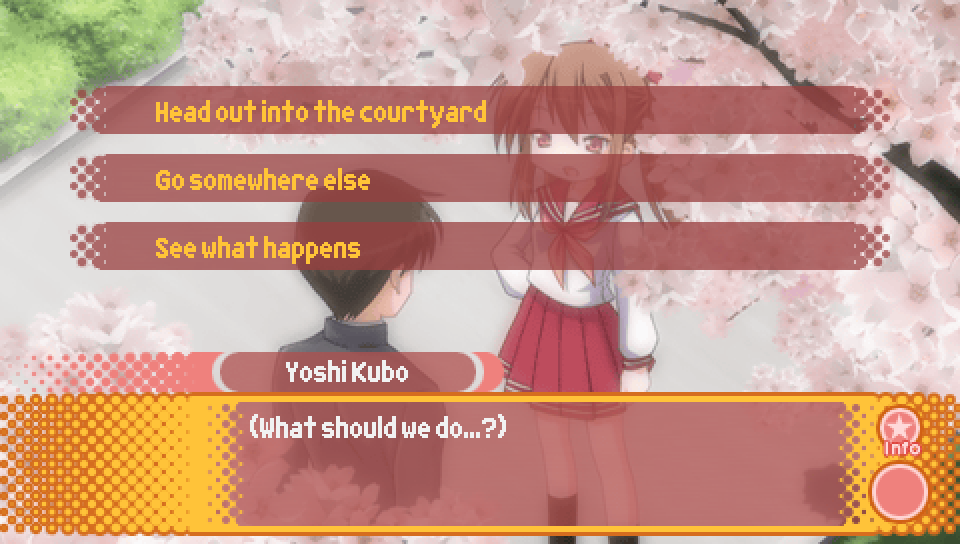
- Head out into the courtyard -- Konata favorability + 3,
time leap to the classroom after Sakuraba Sensei's class.
- Go somewhere else -- Tsukasa favorability + 3,
time leap to the courtyard and help Yutaka (sets the Yutaka flag).
- See what happens -- Miyuki favorability + 3,
time leap to the courtyard during the scene in Episode 1 where Konata proposes clearing the protagonist's route.
Note that you will only see this choice if you picked "For now, just get moving" when the protagonist reunites with
Konata, Tsukasa, and Miyuki.
|
By picking "Go somewhere else" for the above choice, you will set the Yutaka flag after
viewing this scene where the protagonist returns a handkerchief Yutaka dropped. Once the flag
is set, you will be able to play Yutaka's Lucky Lucky Memorial route on this save file the next
time you replay Episode 1.
One thing that's important to emphasize is that the Yutaka flag is set per save file. Unlike the mini-scenarios,
in which meeting the unlock condition on any save file makes it always available, you have to save your file after
viewing this scene and then proceed to complete "The Girls (and Boy) Who Leapt Through Time" on THIS SPECIFIC
save file in order to access Yutaka's Lucky Lucky Memorial route. Often people will miss unlocking the
Yutaka Lucky Lucky Memorial route by viewing this scene, then reloading their save file to pick a different choice,
which will not set the Yutaka flag. This HAS to be the choice you commit to on at least one playthrough of
"The Girls (and Boy) Who Leapt Through Time" on this save file in order for the route to be unlocked.
|
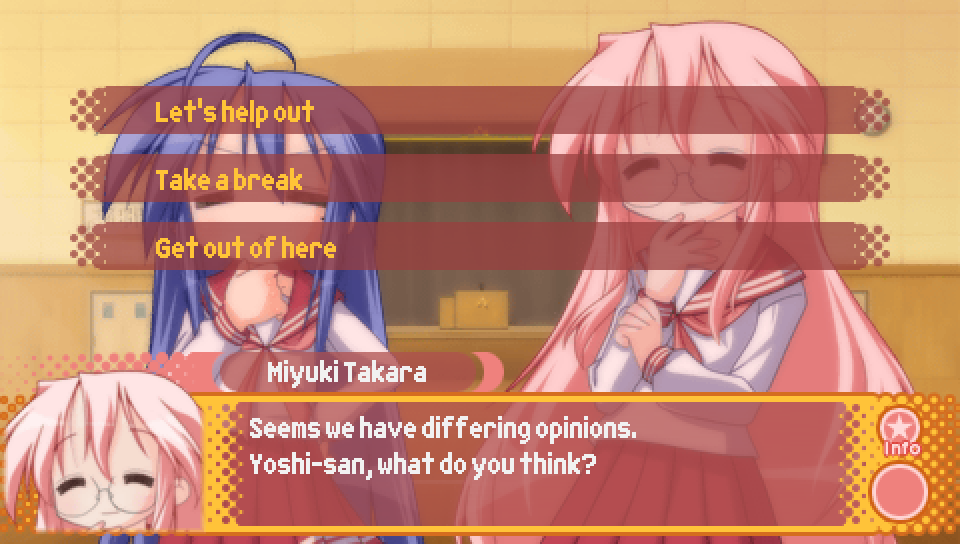
- Let's help out -- Tsukasa favorability + 3,
time leap to Chun's sales pitch in Episode 3.
- Take a break -- Konata favorability + 3,
time leap to the day of the school festival.
- Get out of here -- Miyuki favorability + 3,
time leap to a unique Unlucky★Sisters segment.
Note that you will only see this choice if you picked "See what happens" when the protagonist reunites with
Konata, Tsukasa, and Miyuki.
|
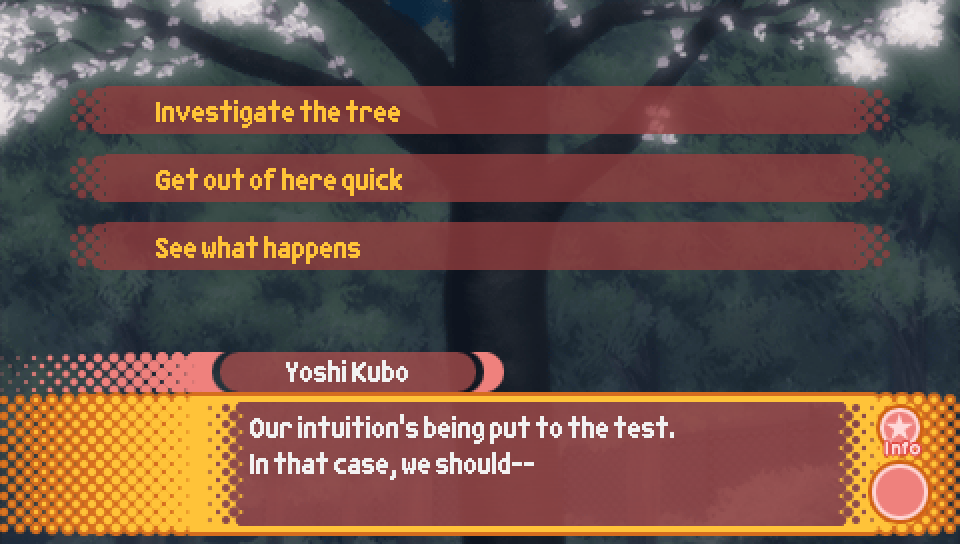
- Investigate the tree -- Konata favorability + 3,
time leap to the past, before Soujirou and Kanata get engaged.
- Get out of here quick -- Tsukasa favorability + 3,
time leap to Konata's bedroom.
- See what happens -- Miyuki favorability + 3,
stay in the current time without time leaping.
Note that you will only see this choice if you picked "Look around the school" when the protagonist reunites with
Konata, Tsukasa, and Miyuki.
|
By picking "Investigate the tree", you will unlock the the Kanata mini scenario once you have
viewed this scene from the time when Soujirou and Kanata get engaged.
|
The Girls (and Boy) Who Leapt Through Time -- Teacher Encounter |
As mentioned previously, a choice you picked near the start of "The Girls (and Boy) Who Leapt Through Time"
when the teachers were in the night duty room determines what happens later on. This is now that point,
occurring at the point where the branching path that began when the protagonist reunites with
Konata, Tsukasa, and Miyuki joins back up.
After the above line marking the point where that previous branch joins back up, you will be taken
to one of three scenes based on which choice you picked. They are as follows:
- Take a look around -- gymnasium, teachers are patrolling outside
- Don't take a look around -- hallway, teachers are in the night duty room
- Try to scare them -- hallway, teachers are patrolling the hallway
|
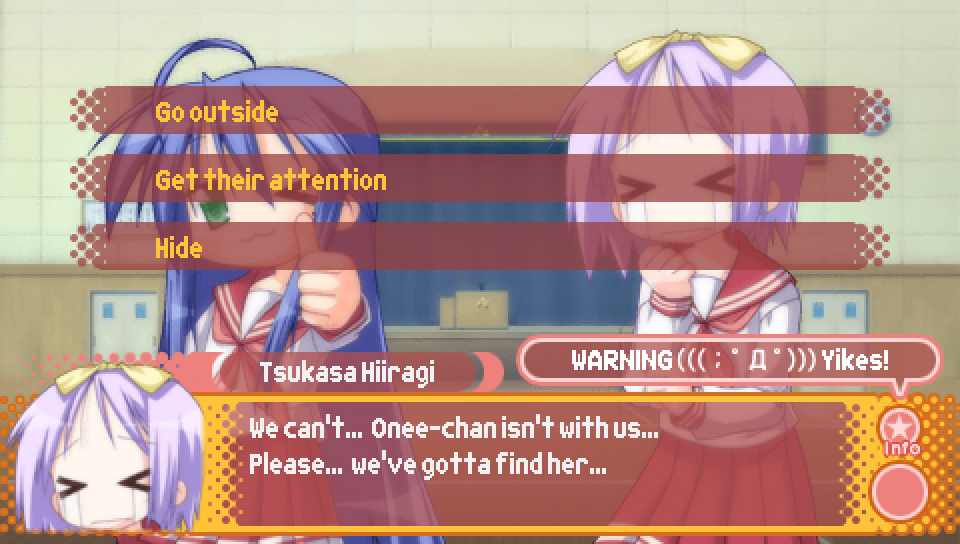
- Go outside -- no effect
- Get their attention -- clear points + 1
- Hide -- no effect
Note that you will only see this choice if you picked "Take a look around" during the night duty room scene.
|
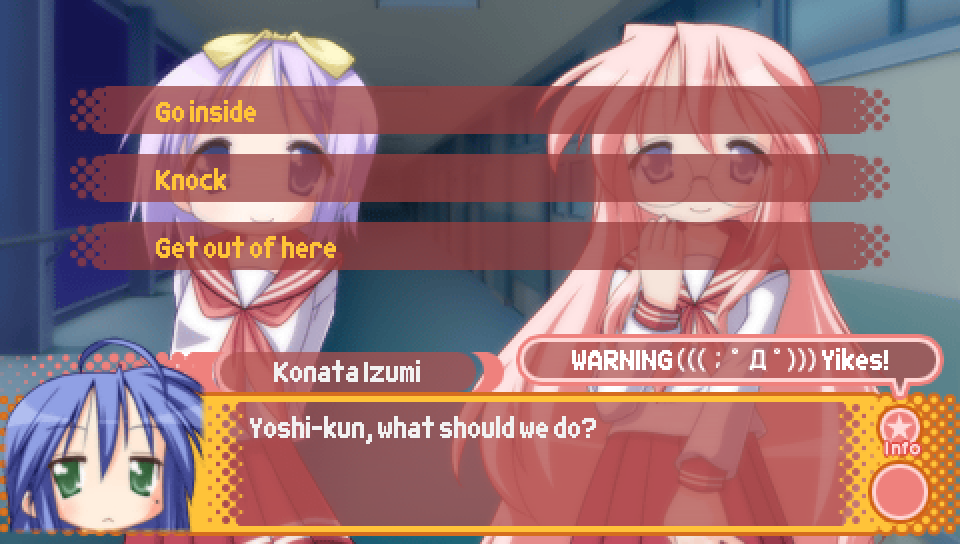
- Go inside -- no effect
- Knock -- clear points + 1
- Get out of here -- no effect
Note that you will only see this choice if you picked "Don't take a look around" during the night duty room scene.
|
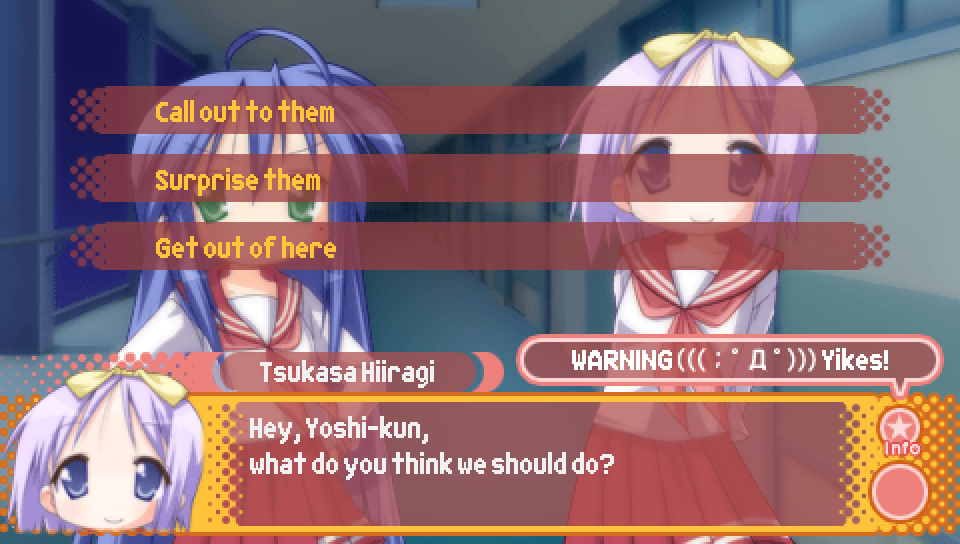
- Call out to them -- no effect
- Surprise them -- clear points + 1
- Get out of here -- no effect
Note that you will only see this choice if you picked "Try to scare them" during the night duty room scene.
|
The Girls (and Boy) Who Leapt Through Time -- Ending Sequence |
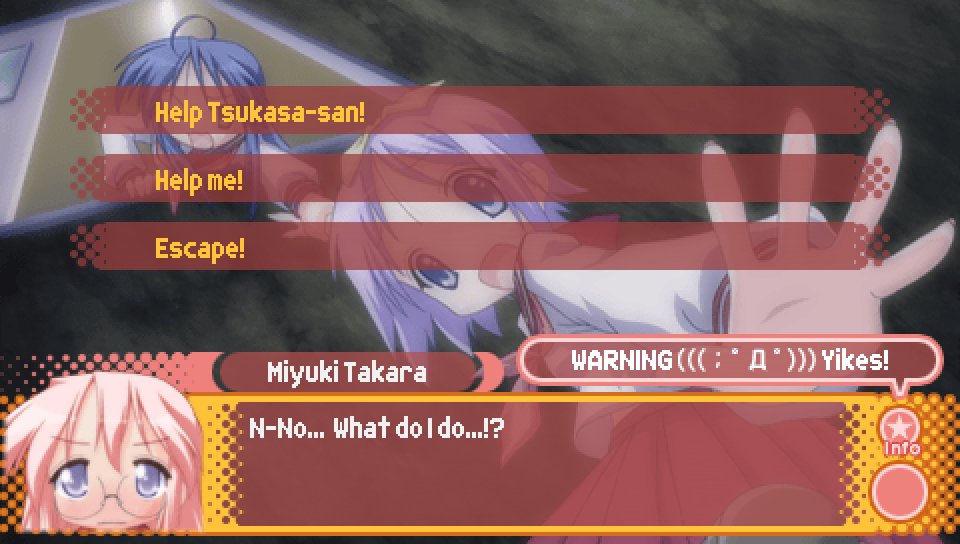
- Help Tsukasa-san! -- clear points + 1
- Help me! -- no effect
- Escape! -- no effect
|
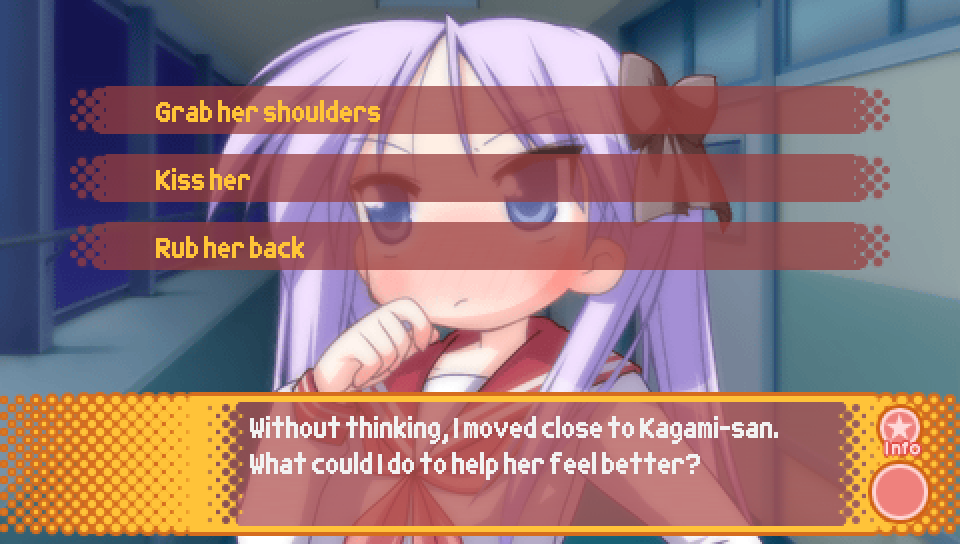
- Grab her shoulders -- Kagami favorability + 3
- Kiss her -- no effect
- Rub her back -- no effect
|
It's at this point where the check is performed to determine whether you get the good or bad ending.
If you have two or more clear points, you will get the good ending, marked by Miyuki responding
with her idea on how to get back home immediately after the above line.
Otherwise, you will get the bad ending, marked by the screen flashing and the hallway losing its color
immediately after the above line.
|
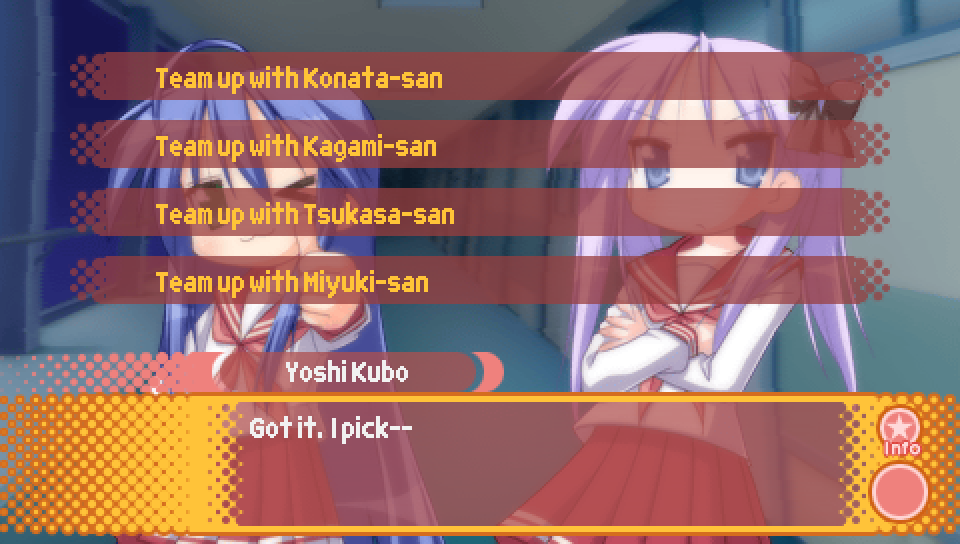
- Team up with Konata-san -- Konata favorability + 3
- Team up with Kagami-san -- Kagami favorability + 3
- Team up with Tsukasa-san -- Tsukasa favorability + 3
- Team up with Miyuki-san -- Miyuki favorability + 3
Note that you will only see this choice if you have gotten the good ending.
Additionally, depending on who you team up with, the scene that follows will be slightly different.
|
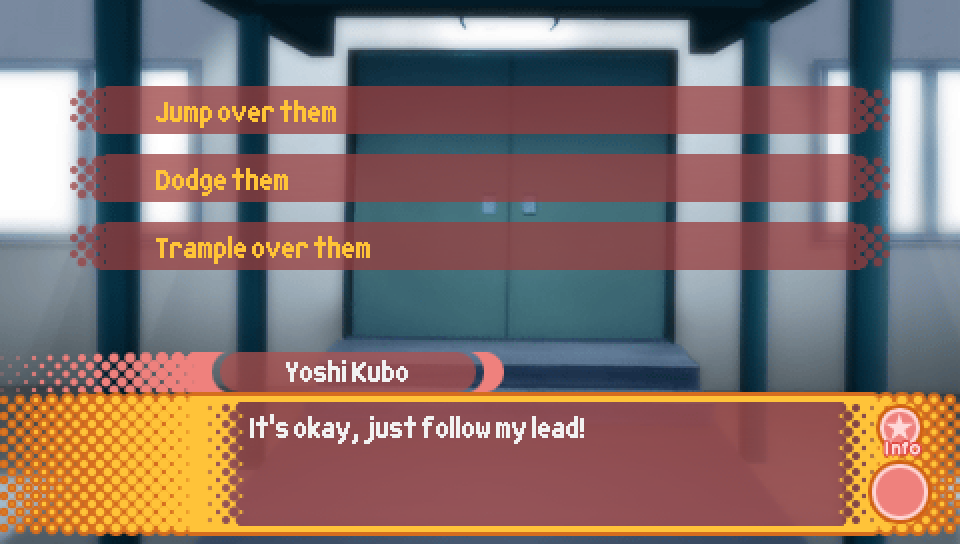
- Jump over them -- Konata favorability + 3
- Dodge them -- no effect
- Trample over them -- no effect
Note that you will only see this choice if you pick "Team up with Konata-san" in the previous choice.
|
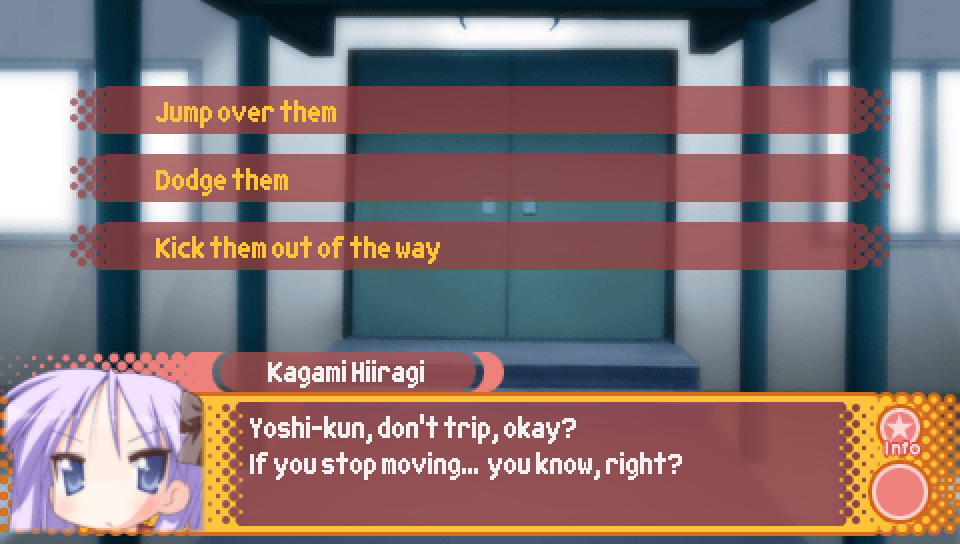
- Jump over them -- no effect
- Dodge them -- no effect
- Kick them out of the way -- Kagami favorability + 3
Note that you will only see this choice if you pick "Team up with Kagami-san" in the previous choice.
|
- Jump over them -- no effect
- Dodge them -- Tsukasa favorability + 3
- Trample over them -- no effect
Note that you will only see this choice if you pick "Team up with Tsukasa-san" in the previous choice.
|

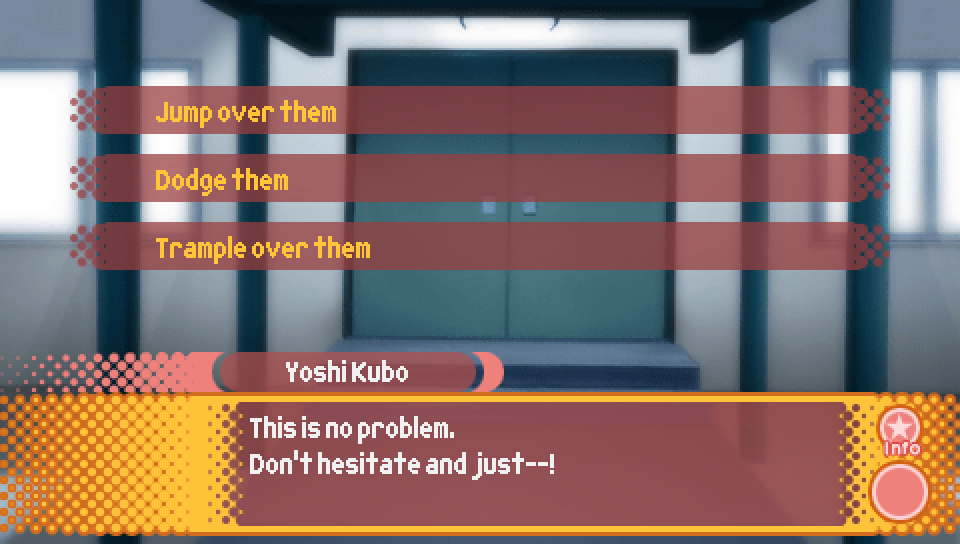
- Jump over them -- no effect
- Dodge them -- Miyuki favorability + 3
- Trample over them -- no effect
Note that you will only see this choice if you pick "Team up with Miyuki-san" in the previous choice.
|
After this line, the protagonist will have a short exchange with Konata, Kagami, Tsukasa, or Miyuki
prior to Kuroi Sensei and Sakuraba Sensei arriving. Which girl it is depends on which of the four
you have accumulated the most favorability with over the course of the route. This is the only thing
that favorability has an impact on in "The Girls (and Boy) Who Leapt Through Time".
|
Route Guide -- Lucky Lucky Memorial (Episode 4 Routes) |
Once you have met the necessary criteria (described above), you can
play through Yutaka's and Minami's Lucky Lucky Memorial routes on future loops on that save file.
This is done by replaying Episode 1 and making the correct choices to get Yutaka's or Minami's
favorability to be the highest before the start of the third day, which will be described below.
But for now, when you get to this choice, pick "Keep Working" to replay Episode 1.
|
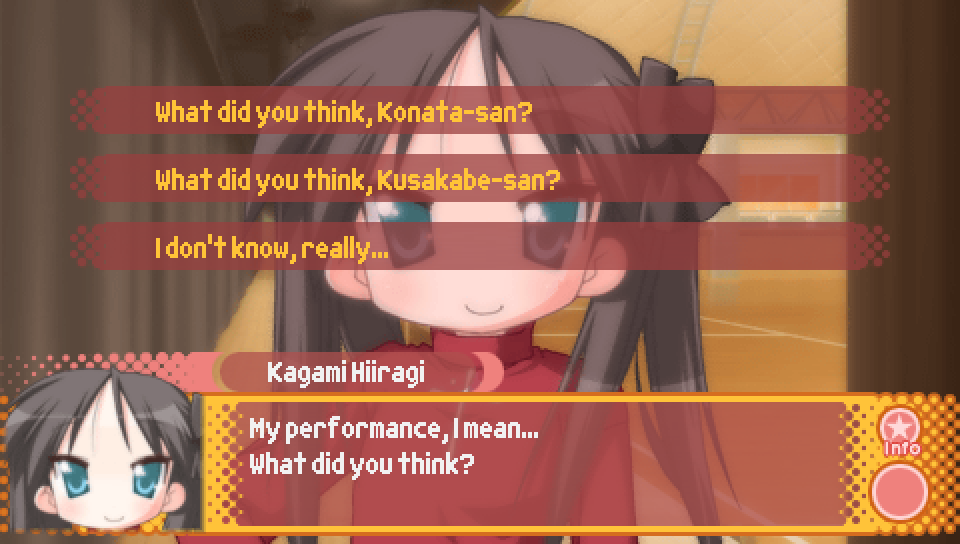
- What did you think, Konata-san? -- Konata favorability + 2
- What did you think, Kusakabe-san? -- Misao favorability + 2
- I don't know, really... -- no effect
If you're aiming for Yutaka's or Minami's route, you'll want to pick "I don't know, really..."
so you don't raise Konata's or Misao's favorability.
Additionally, note that the choice "What did you think, Kusakabe-san?" only appears if you have
gotten the good ending to Ayano's Lucky Lucky Memorial route on the current save file.
|
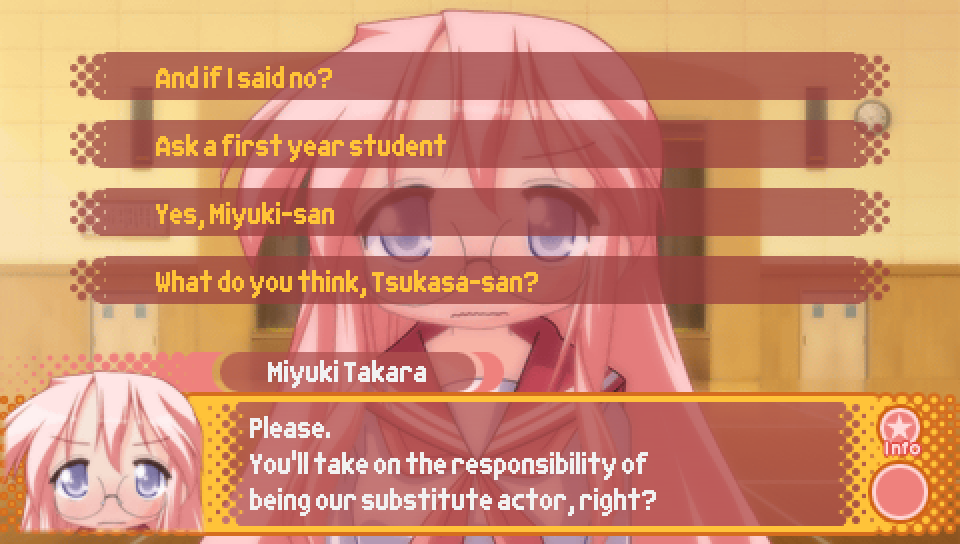
- And if I said no? -- no effect
- Ask a first year student -- go to choice of first year student to ask
- Yes, Miyuki-san -- Miyuki favorability + 2
- What do you think, Tsukasa-san? -- Tsukasa favorability + 2
You'll want to pick "Ask a first year student" so you can choose either Yutaka or Minami
to ask for their opinion and raise their favorability. Note that this choice will only appear
if one of the first year students' routes is unlocked.
|
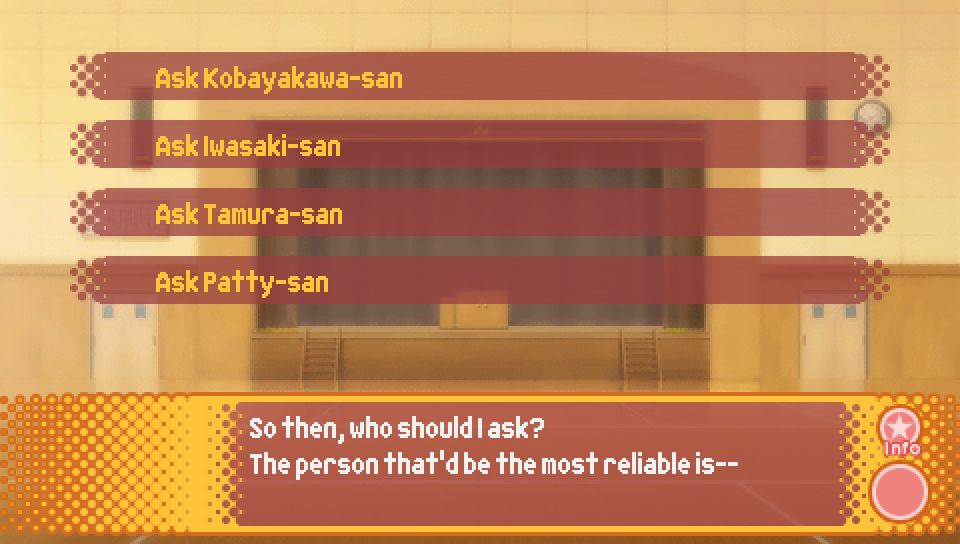
- Ask Kobayakawa-san -- Yutaka favorability + 2
- Ask Iwasaki-san -- Minami favorability + 2
- Ask Tamura-san -- Hiyori favorability + 2
- Ask Patty-san -- Patty favorability + 2
If you're aiming for the Yutaka route, you'll want to pick "Ask Kobayakawa-san".
If you're aiming for the Minami route, you'll want to pick "Ask Iwasaki-san".
Note that each of these choices will only appear if the corresponding girl's route
has been unlocked.
|
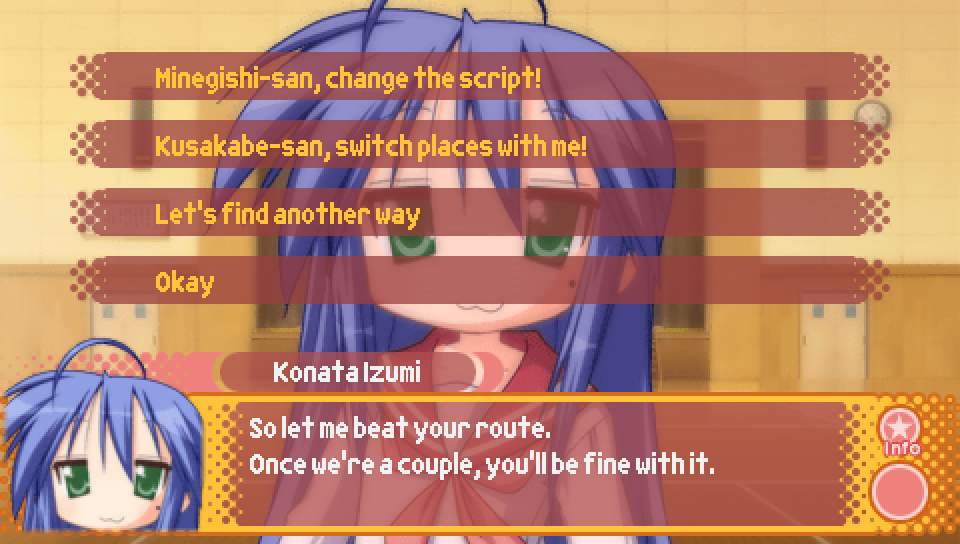
- Minegishi-san, change the script! -- Ayano favorability + 2
- Kusakabe-san, switch places with me! -- Misao favorability + 2
- Let's find another way -- no effect
- Okay -- Konata favorability + 2
You'll want to pick "Let's find another way" so you don't raise anyone's favorability.
Note that "Minegishi-san, change the script!" will only appear if Ayano's
Lucky Lucky Memorial route has been unlocked.
Note that "Kusakabe-san, switch places with me!" will only appear if Misao's
Lucky Lucky Memorial route has been unlocked.
|
It's at this moment that the route you get is decided.
For whoever has the most favorability, you'll end up on that character's route and you'll be given
+4 favorability for that character. So that's +4 Yutaka favorability in the Yutaka route,
and +4 Minami favorability in the Minami route.
In the case of a tie, for the ties that are possible so far,
the order of priority is Konata > Tsukasa > Miyuki > Misao > Ayano > everyone else.
|
Route Guide -- Lucky Lucky Memorial (Yutaka Route) |
Before the protagonist leaves his house to go to school on the first morning
of this route, he'll take some extra money to buy a drink.
This will add 500 yen to your total amont of money, which you can spend on trading cards.
|
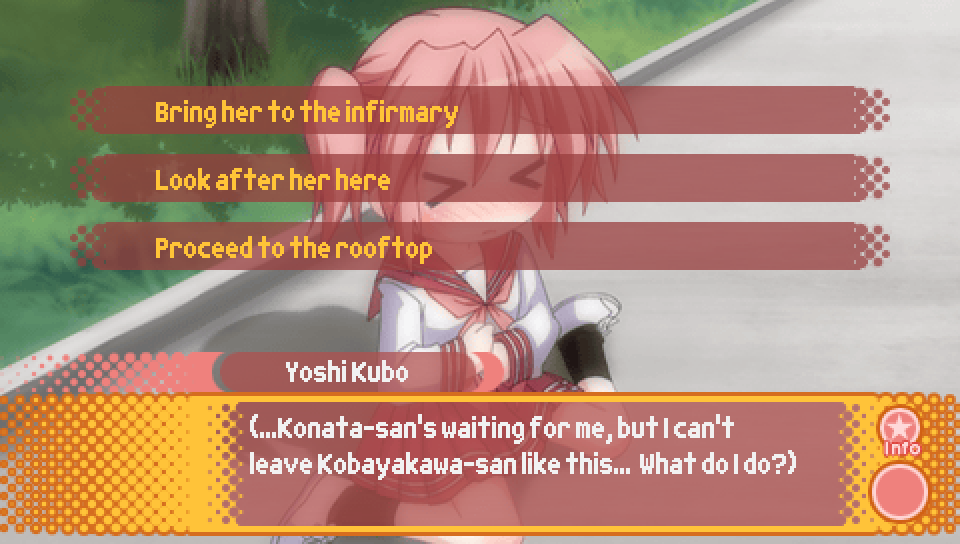
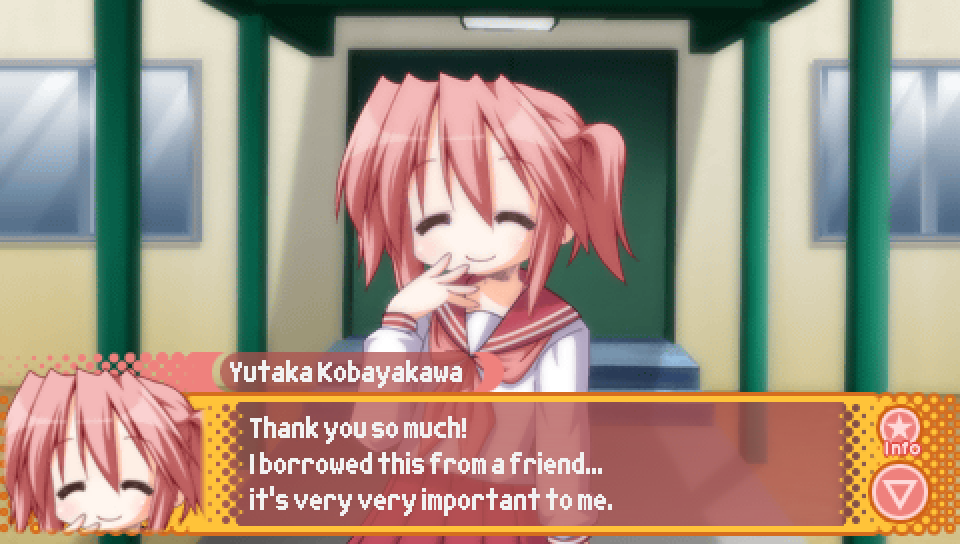
- Bring her to the infirmary -- Yutaka favorability + 2
- Look after her here -- no effect
- Proceed to the rooftop -- no effect
|
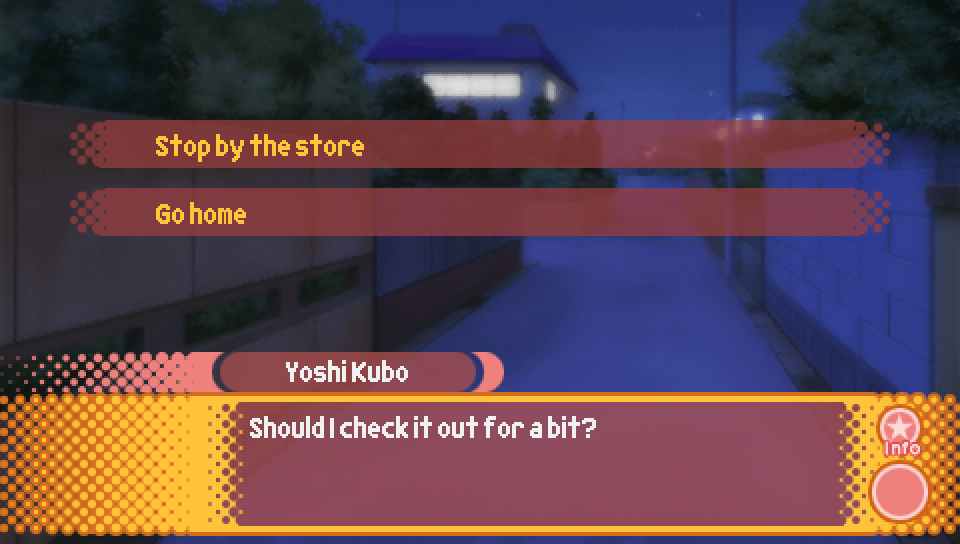
- Stop by the store -- buy trading cards with the Episode 1 distribution
- Go home -- don't buy trading cards
Note that this choice will only appear if you've been to this trading card shop before.
You'll also notice that this choice is slightly different from how it was in previous Episodes.
This is because this scene happens to change a bit now that you are in a post Episode 4 state.
If you happen to have unlocked the Yutaka route without getting the good ending to
"The Girls (and Boy) Who Leapt Through Time", and are playing the Yutaka route in an Episode 4 state,
then you will actually get the version of this scene that has been seen previously. Just in case you
happen to find yourself in that situation, refer to the image below.
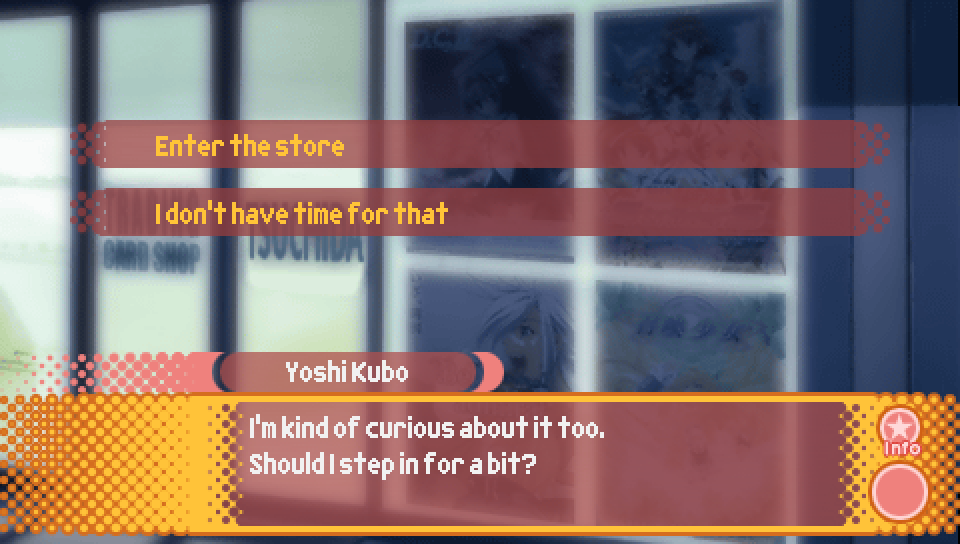
- Enter the store -- buy trading cards with the Episode 1 distribution
- I don't have time for that -- don't buy trading cards
Lastly, as a reminder, the trading card distribution for Episode 1
is that there is a 9.0% chance for cards 1-7 and a 1.1% chance for all other cards.
|
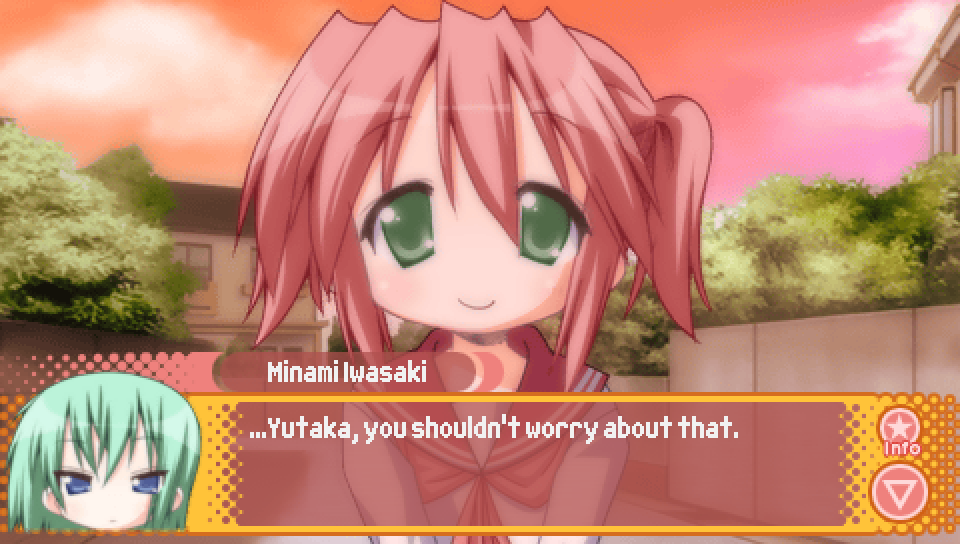
This scene after Konata gets mad at the protagonist and storms out of
play practice contains the first check you have to pass to get the good ending.
To pass the check, you need at least 8 favorability points with Yutaka.
If you pass the check, you will see the above line and the following interaction
where Minami tells Yutaka not to worry about why the protagonist saw Yutaka making
a very sad face in his mind's eye the night before. However, Yutaka insists on trying
to understand why it happened.
If you fail the check, the scene will play out a bit differently.
|

- Talk about anime -- Konata favorability + 2
- Talk about manga -- no effect
- Talk about video games -- no effect
|
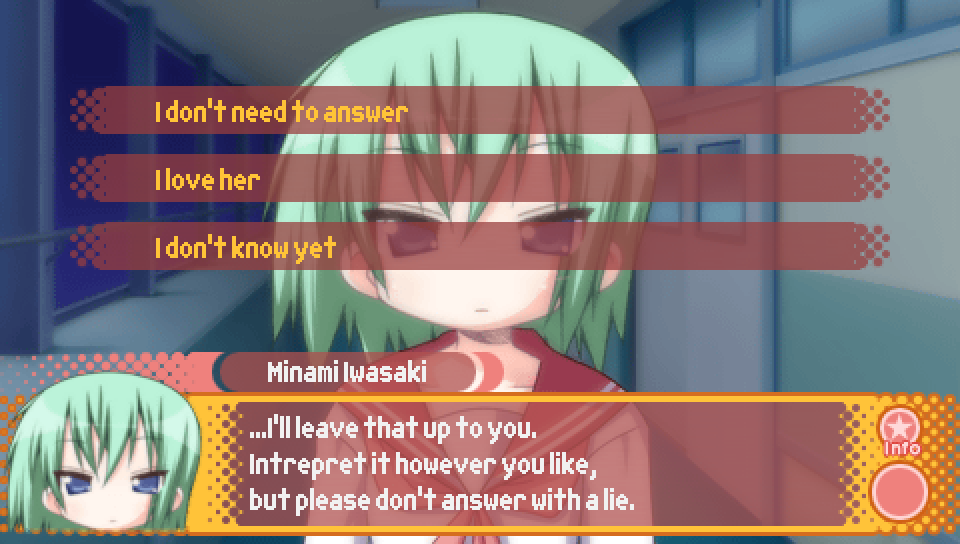
- I don't need to answer -- no effect
- I love her -- Yutaka favorability + 2
- I don't know yet -- no effect
|
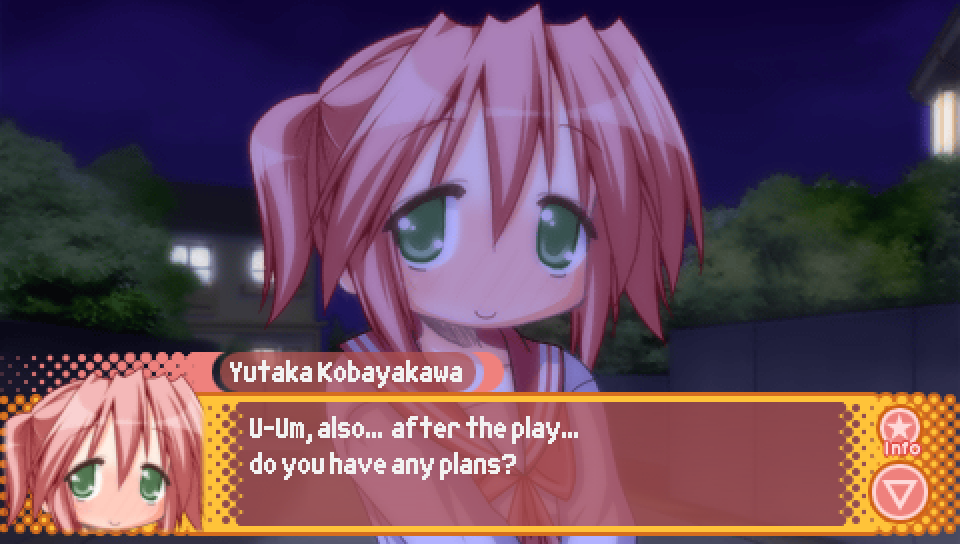
This moment near the end of the scene with Yutaka on the night before the school festival
contains the second and final check you have to pass to get the good ending.
To pass the check, you need at least 10 favorability points with Yutaka and to have passed the previous check.
If you pass the check, just before Yutaka leaves to continue her journey home on her own, she will ask
the protagonist if he has any plans after the play tomorrow.
If you fail the check, Yutaka will leave without asking this and the scene will play out a bit differently.
The following day, you'll get the Lucky Lucky Memorial bad ending.
|
Route Guide -- Lucky Lucky Memorial (Minami Route) |
Unlike every other route in Lucky Lucky Memorial, the Minami route does not give you any money
on the morning of the first day before the protagonist leaves his house. Instead, it's given out
in a later scene, which will be detailed further down.
This is likely due to the joke where the protagonist shouts really loudly in order to wake
Konata up as payback for her attempt to kiss him while he was sleeping, as it skips immediately
to a scene where he and the others are on their way to school without showing the usual moment
of the protagonist getting ready for school.
|
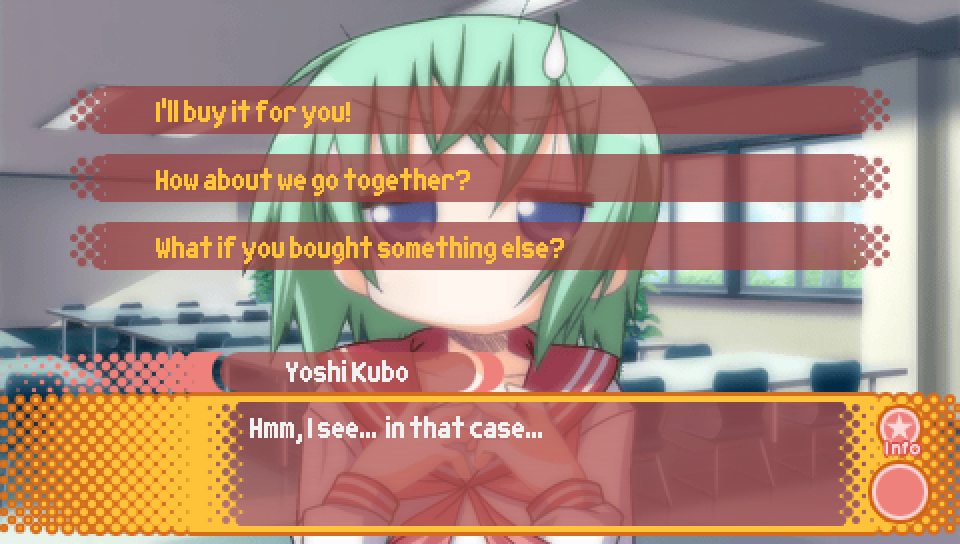
- I'll buy it for you! -- Minami favorability + 2
- How about we go together? -- no effect
- What if you bought something else? -- no effect
|
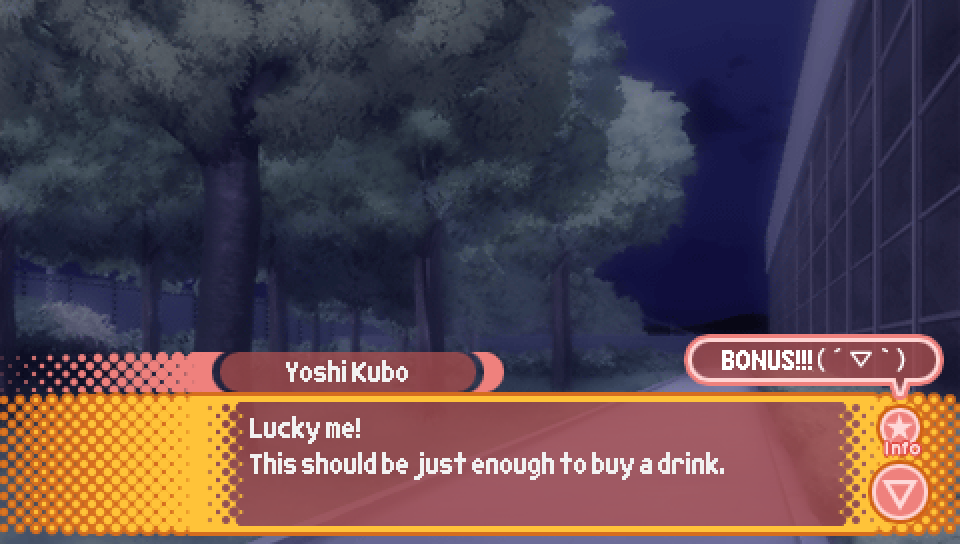
As mentioned previously, the Minami Lucky Lucky Memorial route postpones giving you money
until later on in the route. This is that point, where the protagonist will find some money
in his pocket after his first day of play practice.
This will add 500 yen to your total amont of money, which you can spend on trading cards.
|
- Stop by the store -- buy trading cards with the Episode 1 distribution
- Go home -- don't buy trading cards
Note that this choice will only appear if you've been to this trading card shop before.
You'll also notice that this choice is slightly different from how it was in previous Episodes.
This is because this scene happens to change a bit now that you are in a post Episode 4 state.
If you happen to have unlocked the Minami route without getting the good ending to
"The Girls (and Boy) Who Leapt Through Time", and are playing the Minami route in an Episode 4 state,
then you will actually get the version of this scene that has been seen previously. Just in case you
happen to find yourself in that situation, refer to the image below.
- Enter the store -- buy trading cards with the Episode 1 distribution
- I don't have time for that -- don't buy trading cards
Lastly, as a reminder, the trading card distribution for Episode 1
is that there is a 9.0% chance for cards 1-7 and a 1.1% chance for all other cards.
|
This scene after Konata gets mad at the protagonist and storms out of
play practice contains the first check you have to pass to get the good ending.
To pass the check, you need at least 8 favorability points with Minami.
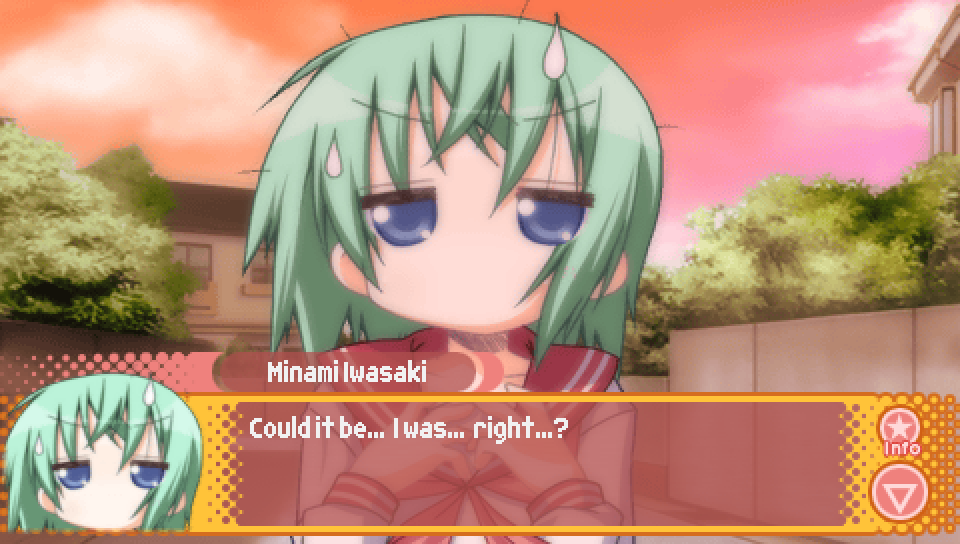
If you pass the check, you will see the above line and the following interaction
where Minami finds herself thrown aback at the realization that she might have been
right about something with respect to why the protagonist couldn't get the sight of her
out of his mind the night before.
If you fail the check, the scene will play out a bit differently.
|
- Talk about anime -- Konata favorability + 2
- Talk about manga -- no effect
- Talk about video games -- no effect
|

- Why do you ask? -- no effect
- I want to be there for her -- Minami favorability + 2
- I don't know yet -- no effect
|
This moment near the end of the scene with Yutaka and Minami on the night before the school festival
contains the second and final check you have to pass to get the good ending.
To pass the check, you need at least 10 favorability points with Minami and to have passed the previous check.
If you pass the check, Minami will call the protagonist after she and Yutaka leave, asking the protagonist
if he has any plans after the play tomorrow.
If you fail the check, the scene will immediately end after the above line.
The following day, you'll get the Lucky Lucky Memorial bad ending.
|
|